
Der vielleicht coolste interaktive Adventskalender 2017
Hallo zusammen.
 Die Adventszeit ist nun angebrochen und was darf da nicht fehlen? Genau, ein Adventskalender. Eigentlich bekommen eher die kleinen so einen Kalender, der meist mit Süßigkeiten gefüllt ist. Aber manchmal auch die großen. :-)
In diesem Jahr bin auch ich quasi dem Thema ‚Adventskalender‘ konfrontiert wurden. Die Grundidee war einen Kalender zu basteln. Da kam dann schnell der Ehrgeiz ‚Wenn ich schon mal einen Adventskalender bastel, dann doch bitte gleich richtig‘. :-D
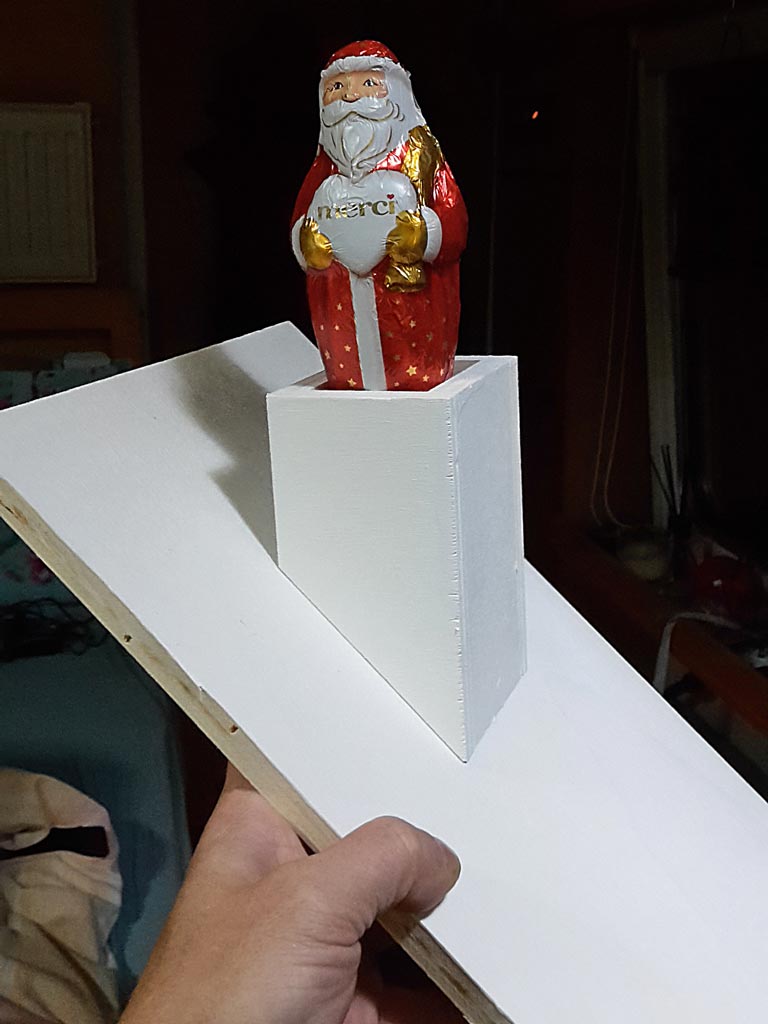
Also was genau ist bzw. braucht es für einen richtigen Adventskalender? 24 ‚Türchen‘ natürlich. Am besten Tüten oder Boxen, wo man die kleinen, netten Überraschungen für die 24 Tage unterbringen kann. Doch wie, was, warum?
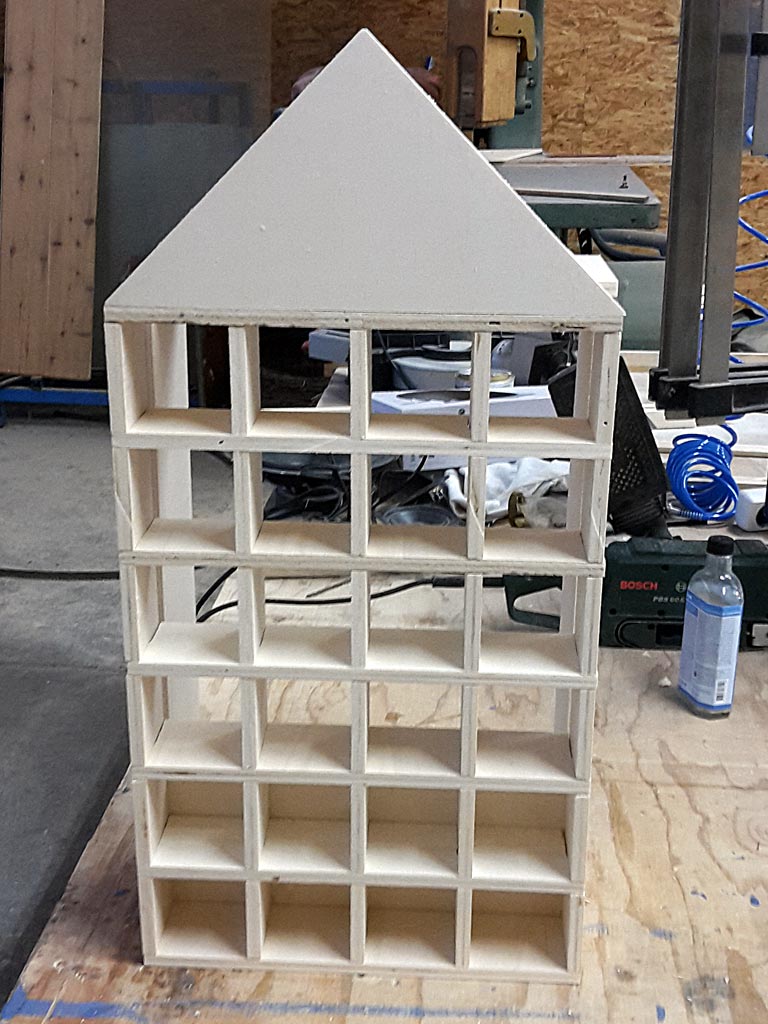
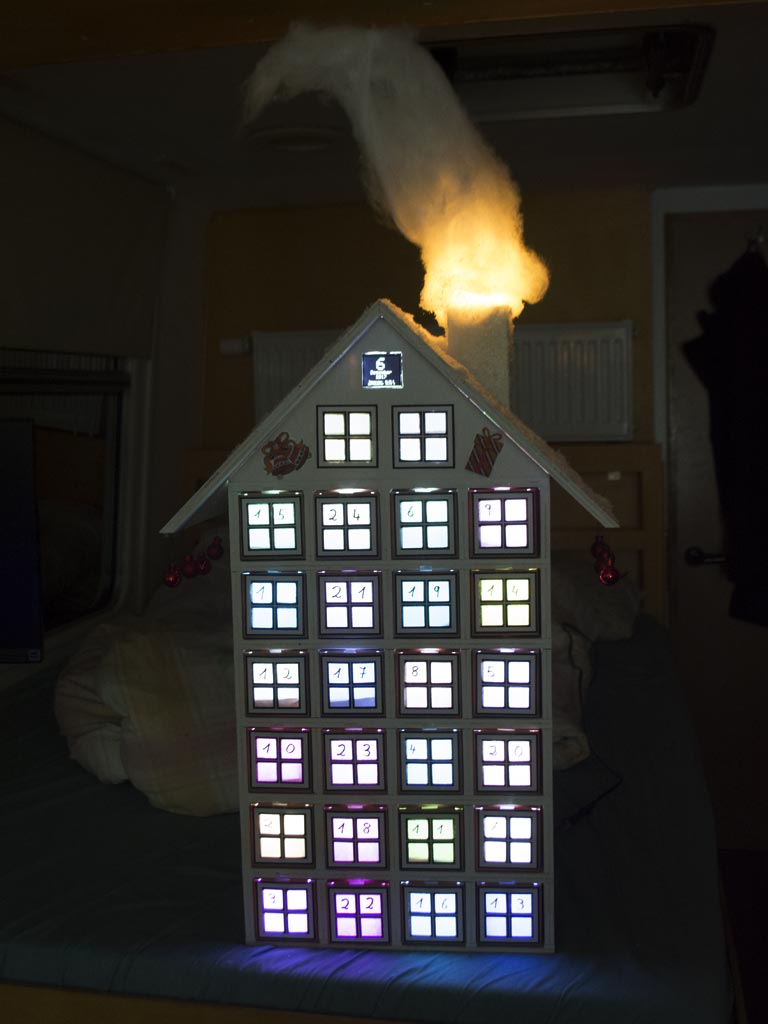
Schnell stand fest, es sollte sich um das ‚Nikolaushaus‘ handeln. Also ein Gerüst aus Holz, in dem die Boxen untergebracht werden können, das nach einem Haus aussieht.
Gut, soweit der Plan.
Dann hört man ja immer wieder von bösen Mädchen und Buben, die es nicht abwarten können und schon vorher Türchen aufmachen, die noch gar nicht an der Reihe sind. Das muss unterbunden werden! :-D Und dann bin ich ja eh gerade auf deinem ‚Lampen‘ Trip… also muss das Haus auch beleuchtet werden.
Soweit der grobe Plan.
Nach ein paar detailierteren Überlegungen stand dann finale Plan fest:
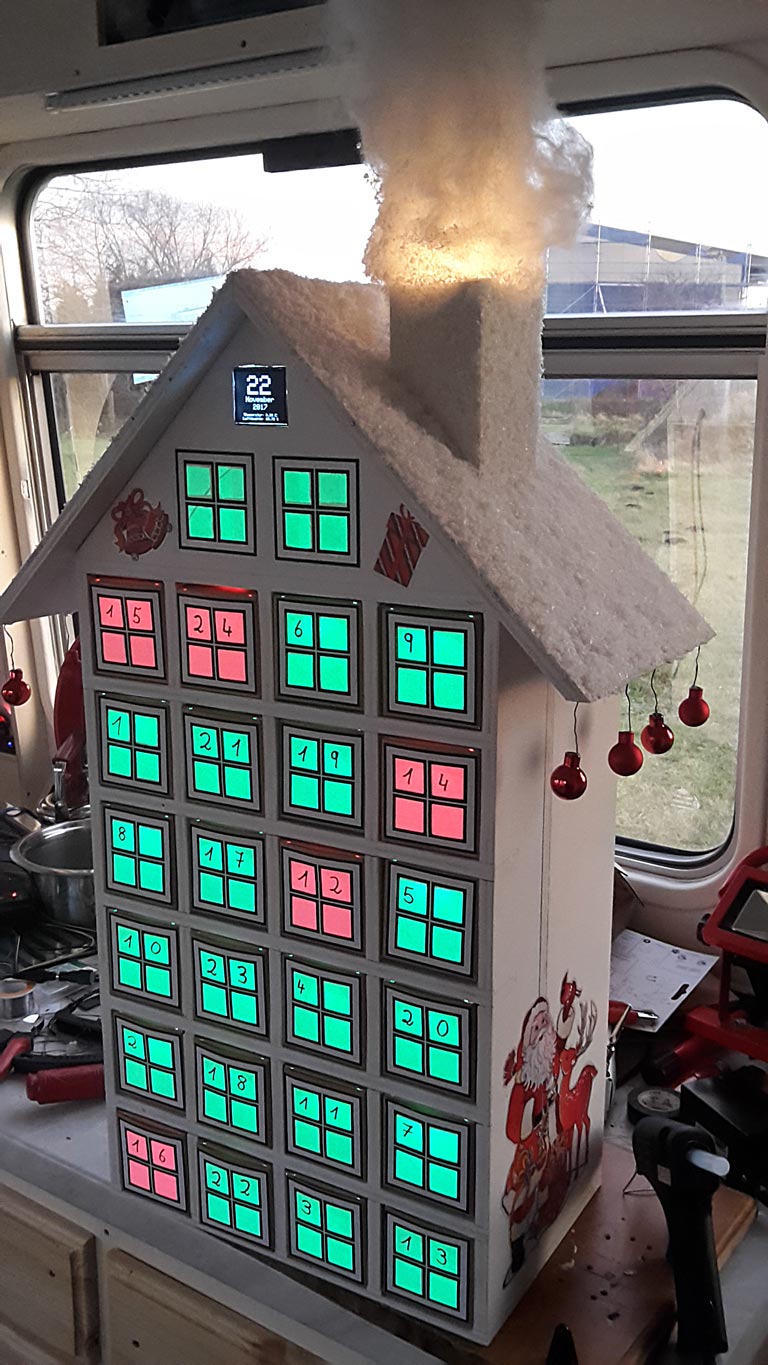
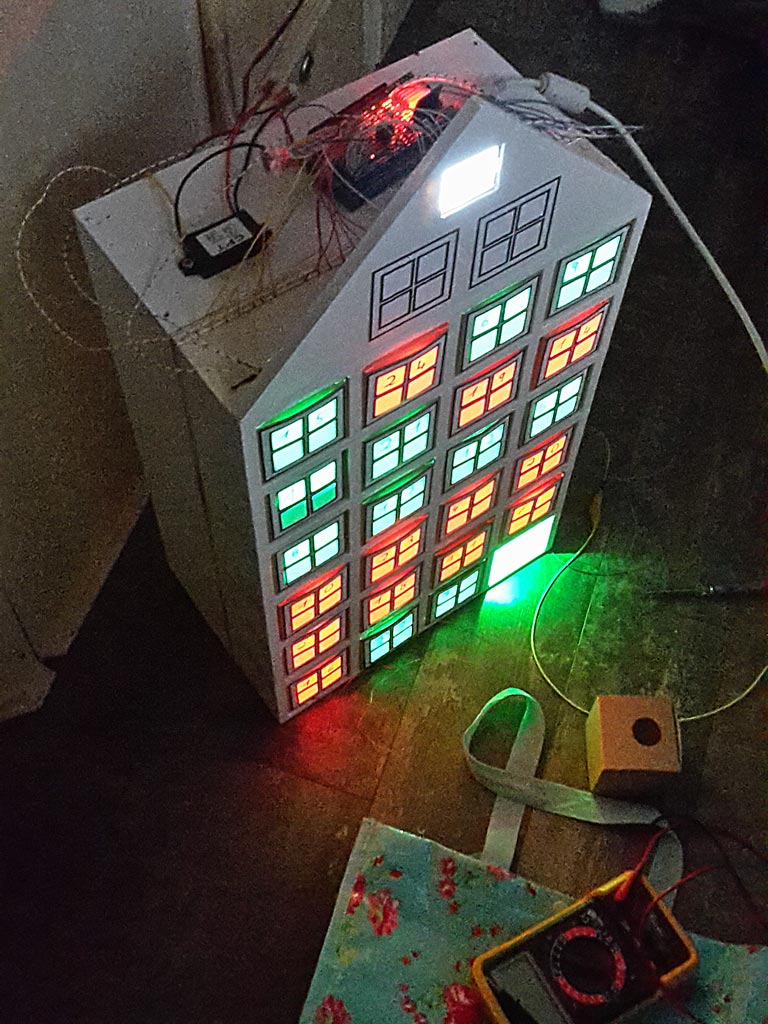
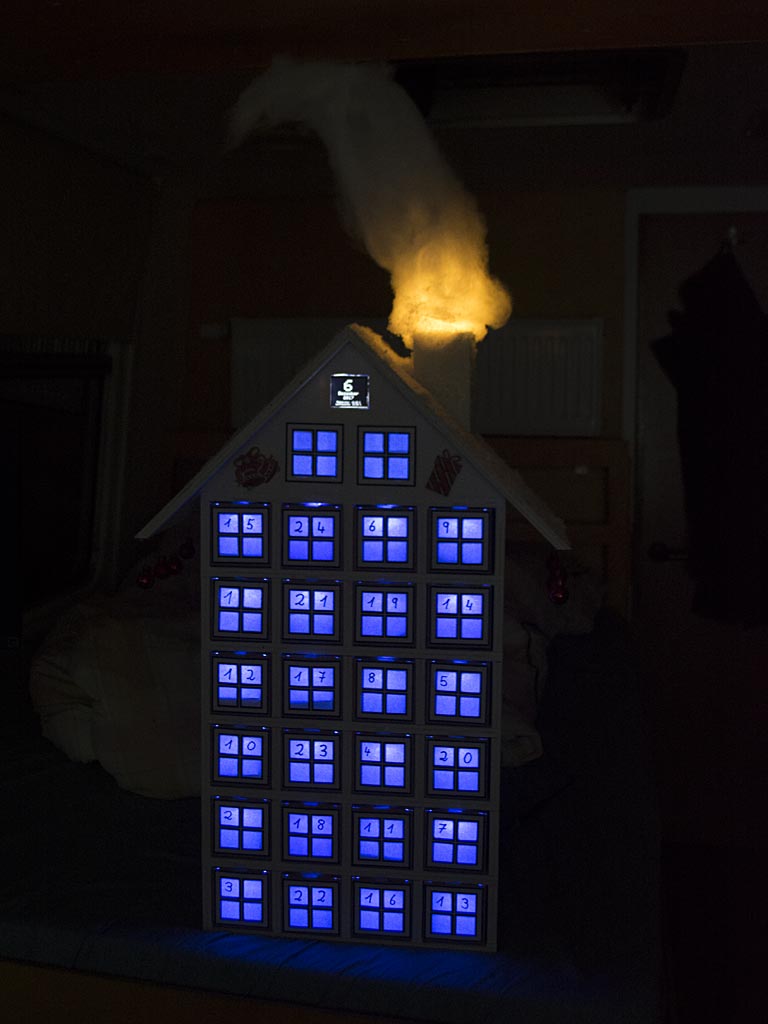
Jede Box soll ein Fenster bekommen (ein Haus hat ja nun mal Fenster). Dieses soll beleuchtet werden. Also muss in jedes Fach eine LED, die dann von oben in die Box scheint und damit auch das Fenster erhellt. Um das Schummeln zu unterbinden muss der Adventskalender wissen welcher Tag es ist und welche Box herausgezogen wurde. (Das ein Arduino im Spiel ist, muss ich wohl nicht mehr Erwähnen ;-) ). Dazu muss jede Box mit einem ‚Schalter‘ verbunden werden, der mitteilt ob eine Box im Fach ist oder nicht. Wird die falsche Box herausgezogen (also eine mit Datum in der Zukunft), dann soll der Kalender Rabatz machen. Wird jedoch die Box des heutigen Tages herausgezogen, dann soll ein Weihnachtslied gespielt werden.
So ein Haus hat auch einen Schornstein mit Rauch… es ist ja kalt im Winter und da wird geheizt. Der Rauch muss natürlich auch beleuchtet werden.
Und wenn wir schon dabei sind… muss auch noch ein Display in das Haus, das dass aktuelle Datum anzeigt (nur falls man am Morgen noch nicht ganz wach ist und nicht weiß welcher Tage gerade ist).
Und da wir schon so viel Licht im Haus verbauen, dann kann man auch gleich nocht ein paar Spielereien einbauen, so das der Kalender auch gleich als Licht/Lampe genutzt werden kann. Zum Beispiel kam mir die Idee die Fenster zufällig zu beleuchten. So wie in einem richtigen Haus… hier ist ein Licht an und da ist ein Licht an. Und dann geht hier und da auch mal eins aus oder an. Die Imitation eines richtigen Hauses quasi.
(Hätte ich gewusst was ich mir damit einbrocke… hätte ich wohl noch einmal darüber nachgedacht!! :-) )
Und los ging es mit dem Basteln.
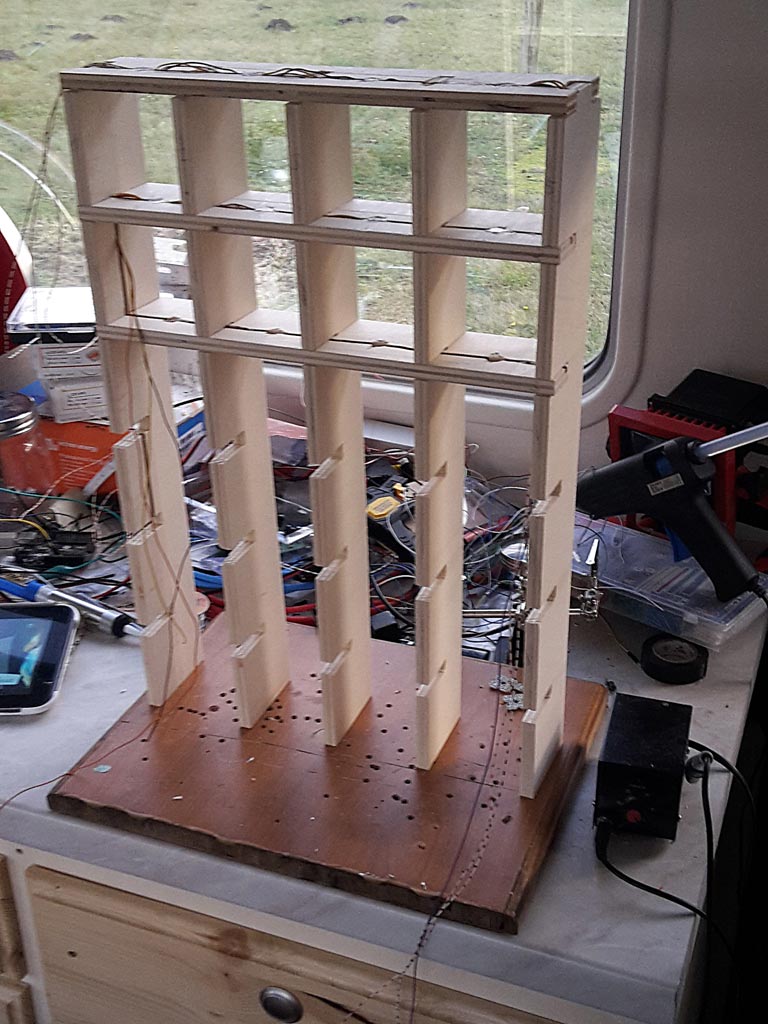
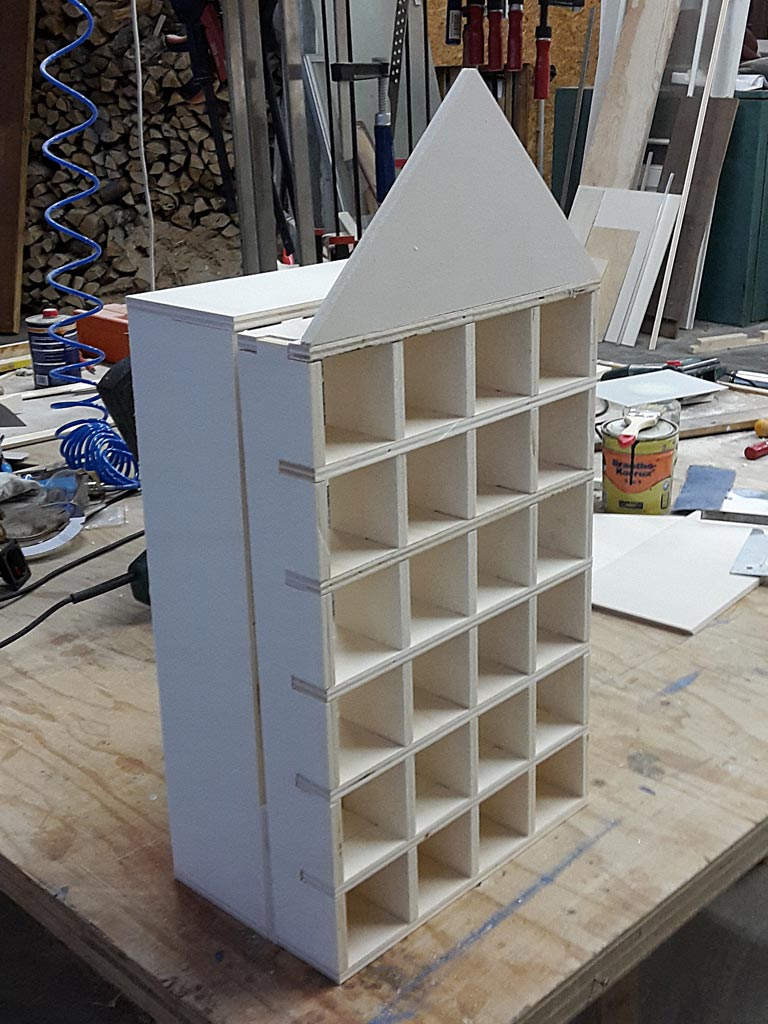 Als erstes musste das Haus gebaut werden. Die Boxen sind 6,5cm x 6,5cm. Um ein bisschen Luft zu lassen, habe ich die Öffnungen für die Boxen 7x7cm gemacht. 7cm tiefe ist allerdings nicht sehr viel. Damit wäre das Haus sicher ständig umgekippt. So habe ich die Tiefe auf 20cm erweitert und hinten gleich noch ein bisschen ‚Stauraum‘ für etwas größere Überraschungen erhalten. Ich brauchte eh eine Trennwand um die Verkabelung für die Schalter unterzubringen.
Zwischendurch musste ich dann auch die LEDs verlöten. Dazu habe ich in jedes Fach oben ein Loch ins Holz gebohrt und eine SK6811 versenkt. Die sind rund und passen genau in ein 10er Loch. Das schöne an den SK6811 ist, das sie ‚intelligent‘ sind und nur einen Pin am Arduino benötigen. Sie geben das Signal immer an die nächste LED weiter. Somit brauchte ich immer nur 3 Kabel, von LED zu LED. Und nicht von jeder LED 3 Kabel zum Arduino. Das ist sehr praktisch.
Die LEDs dann mit Heißkleber fixiert und schon war das fertig.
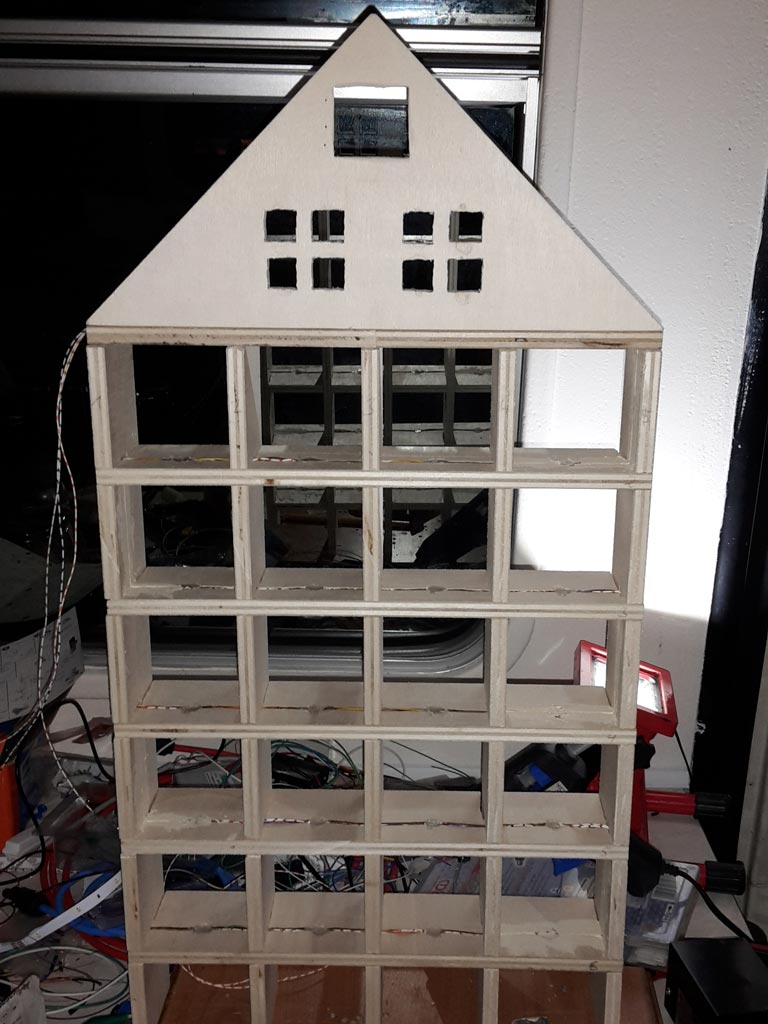
Dann der Dachfirst. Hier musste ich die beiden Fenster ins Holz schneiden und die Öffnung für das Display aussägen. Vor die Fensteröffnungen dann das ‚Fensterpapier‘ geklebt und das Display in die Öffnung geklebt.
Und noch 3 LEDs in den Schornstein einbauen und diesen am Hausdach befestigen.
Am fummeligsten war die Thematik mit den Box-Schaltern. Um das zu bewerkstelligen musste ich 28 nuten in die Trennwand schneiden, um dort die Kabel zu versenken. Aber nur so weit das sie gerade so drin sind. (24 Datenleitungen 1x Masse pro Reihe) Ich hatte die tolle Idee einfach selbstklebende Kupferfolie zu nehmen. Erschien mir am einfachsten. 2 Streifen unter die Box (1x Datenleitung, 1x Masse) und noch einen Streifen unter die Box. So würde diese den Kreis schließen sobald sie im Fach ist. Funktionierte nur leider nicht immer. Eine kleine Unebenheit, eine kleine Wölbung im Boden der Pappschachtel … und schon ist kein Kontakt da. Also musste ich die Hälfte der Streifen an der Pappschachtel noch mit ein bisschen Lötzinn versehen, damit der Kontakt – mehr oder weniger sicher – hergestellt wurde.
Definitiv war es eine ganz schöne Fummelei. Aber irgendwann war es erledigt.
 Was noch fehlte waren die RTC (Real Time Clock, damit der Arduino weiß welcher Tag ist und sich das auch merkt wenn der Strom mal weg ist), ein Empfänger für die Fernbedienung (Jaaa! Fernbedienung für den Adventskalender! ;-) Wie soll man denn sonst durch die Lichtmodi schalten?) und der Buzzer für das Weihnachtslied bzw. den Alarm.
Den Buzzer und die RTC habe ich auf ein Arduino Mega Prototyping Shield gelötet. Da war auch schon ein DHT22 Sensor (Temperatur und Luftfeuchte) drauf. … Na wenn er schon mal da ist, dann kann man ihn ja auch gleich noch nutzen. Also gibt der Kalender, auf dem Display, auch gleich noch die Temperatur und Luftfeuchte aus. Warum nicht? :-)
Die Empfänger LED für die Fernbedienung habe ich hinter den Fenstern im Dach installiert. So ist er von außen nicht sichtbar. Dafür muss man aber auch ein bisschen ‚Zielen‘.
Zudem habe ich noch eine Photodiode verbaut. Ich wollte eigentlich das der Adventskalender von alleine anfängt zu leuchten, wenn es dunkel wird. Das habe ich aber später verworfen.
Und dann ging es an die Programmierung. Hinterher erscheint alles sehr logisch und einfach. Doch wenn man anfängt, dann ist das ganz und gar nicht so. Man fängt an und hat ständig irgendwelche Stolpersteine im Weg. Wie z.B. das ein Adruino nur Single-Thread verarbeitet. Meist ist das nicht so tragisch. Aber wenn man ein Lied abspielen möchte und dabei noch Lichter schalten will, dann geht das nicht.
Aber nach vielen Stunden war es dann endlich soweit. Das gute Stück war fertig… mehr oder weniger.
Und hier das ganze noch in Aktion:
Noch ein paar mehr Bilder:


Was wurde Verbaut:
- Arduino Mega 2560
- RTC
- Buzzer
- SK6811 LED
- Würfelboxen
- Fernbedienung Empfänger
- Photodiode
- Ein bisschen Werkzeug und Holz
- Watte
Winterliche Grüße
Gordon
Update: Ich wurde des öfteren nach dem Code gefragt. Du kannst ihn [hier downloaden]. Es ist jetzt aber schon eine ganze Weile her und ich weiß nicht ob das der Finale Code war. Denke aber schon.
Letzte Kommentare